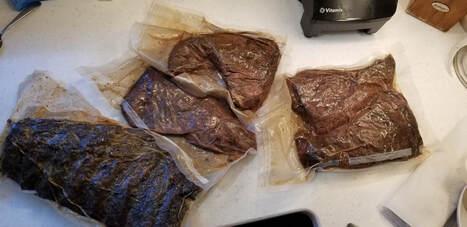
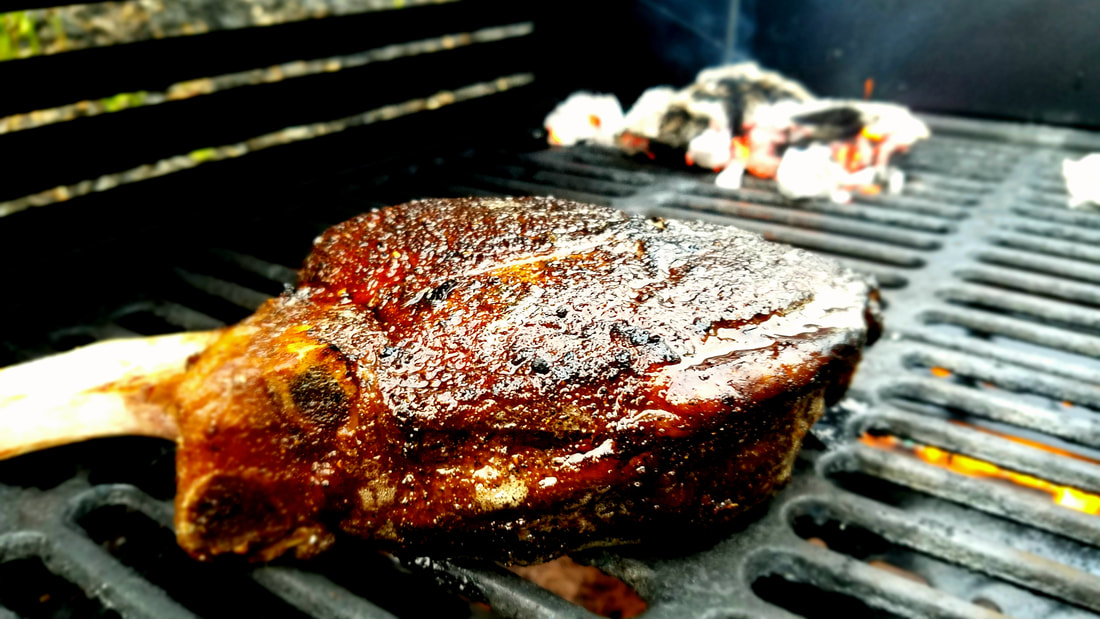
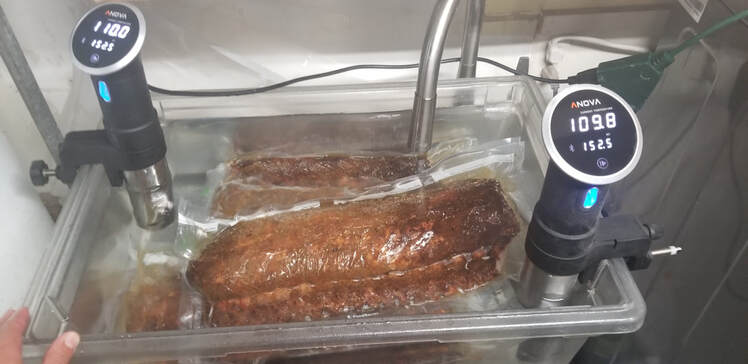
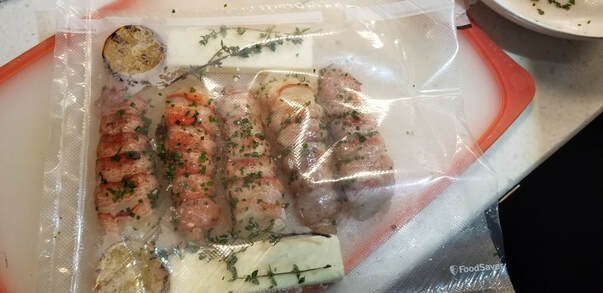
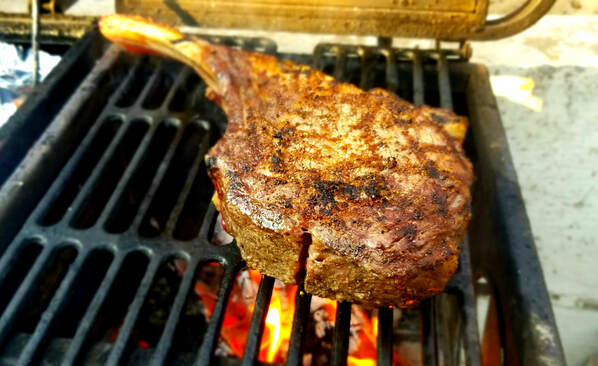
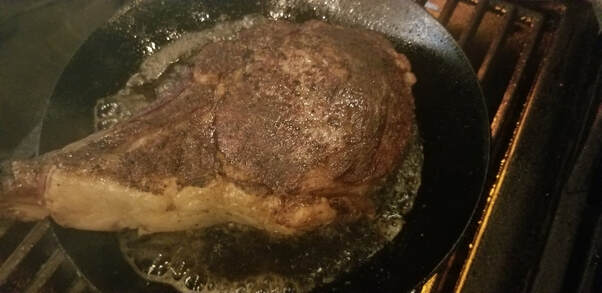
 Well now then, make yourself comfy and read on! *First, let me warn everyone to brush up on their food safety! The wrong food in a water bath for prolonged periods could be dangerous and even fatal. One place to read up on what not to do is HERE. Now onto the cooking! Sous-vide is a fun, and often delicious way to cook proteins and vegetables. I received a question yesterday in my inbox asking when the best time is to apply Chef's Palette seasonings to proteins such as a pork tenderloin in this case (thanks for the question Mary B. from St. Helena!). The answer is pretty lengthy, as most answers in the kitchen are - especially if you're asking me and then dependent upon amount variable a) the amount of wine involved and b) if you are curious/foolish enough to keep asking follow-up questions!When you put on your rub depends on when you brown your meat and how. Great flavor comes from browning meat (the maillard reaction) at one or even two stages. I often employ the two stage method when I sous-vide. browning the meat before bagging develops a flavorful crust that is then absorbed into the meat along with salt and some seasoning. Most seasonings do not penetrate deeply into meat even with marinating or sous-vide. Some alliums like onion and garlic will kind of be brought in when curing meats such as prior to preparing a confit, but for the most part it's all about proper salting and a flavorful crust. I typically avoid any wet ingredients going in so I don't have a lot of clean up with the small residential food sealers. Commercial vac chambers can seal wet ingredients without spilling a drop, but take up a ton of space and are not the cheapest. I have been known to manually hit the seal button before BBQ sauce makes it all the way to the top of the bag though. In the top picture you can see some baby back ribs that were smoked for two hours and then cooked for another sixteen hours at 152°F. They were rubbed with my Mighty Fine for Swine before their adventures began and the two hours on the indirect smoker gave them a good flavorful crust. When I served them I brought them back either over a hot grill or in a hot convection oven while lacquering on the BBQ sauce. Pro-tip, use the juices from you bag o' ribs to make your store bought sauce a little better! I sweat minced onions and sometimes a-LOT garlic in a little bacon fat before dumping in the juices and simmering with a bottle of something from the store and maybe some extra apple cider vinegar, honey, and maybe some molasses or Dijon. It really just depends on my mood that day, ya' know? The picture right above here is of some beef ribs and tri-tip, all lightly smoked and then sous-vide (ribs and tri-tip separately and at different temps). The tri-tip was seared in a non-stick pan before service to crunch up the outside but a grill could also work. This leads us into the subject of when to apply rubs or other seasonings. This all depends on the seasoning and the method by which you intend to finish the protein. I often salt large cuts a day or two before cooking, then thoroughly dry the meat and sear on high heat until well crusted. Most of my blends have a low salt content I can then apply them liberally before and after if I like. This keeps them from being destroyed by fire. After I remove my protein from the tank I will either sear the meat in a pan, on a grill, in a screaming hot convection oven, or under a broiler. Never serve soggy meat! Two of my blends do not love high, direct heat and may wind up sticking in some pans: the Mighty fine for Swine does it a little, but the Porcini Espresso much more so. This is because the dehydrated porcinis are hydrophilic, meaning they are attracted to water. This causes them to steal any water they can from the outside of the protein but they are not wet enough to resist being blasted dry by the pan. Being applied after a good hard sear and then cooked sous-vide with the protein hydrates them well enough to stay put when finishing for service. If you sprinkle the Porcini Espresso blend over a piece of meat and toss it directly into a hot pan you can expect it to stick and burn. The remedy for this is to use indirect finishing methods when cooking with any spices or blends that you often find behaving this way. It's not you, it's them ;) A few more pics and descriptions below and also... Speaking of sous-vide: check out Baker's Bacon if you haven't already! Apart from delicious dry-cured bacon he has a bunch of other stuff including sous-vide slab bacon. You take it out, cut a 1/2" slice and toss it in a hot pan, Quickly brown both sides, and sing the Hallelujah Chorus out loud and not just in your head. It's Damn Good! and Tony Baker is good peoples :) who also supports Chef's Palette :) https://www.bakersbacon.com Cheers! Here are some lobster tales that I sealed up with my Seasoned Salt, chives, thyme, charged lemon, and a whole damn stick of butter. I used these juices to mount into a buerre blanc for service. This was after already whisking in soft butter to get it started. I've also gone straight buerre monte with this yummy nectar. I seared this Prime Tomahawk over an oak fire that I was getting ready for smoking, then dropped it in the tank for 24+ hours and finished it by butter basting it in carbon steel. I did this outside to avoid smoking up the house since it was a warm evening anyway so that's why the lighting is not so great. meh. Tasted a-mazing.
1 Comment
 Makes 2 - 4 servings This recipe could just as easily be titled “Yukon-Fennel Gratin with any steak and some greens because my mom might read this.” No stress on the beef. It’s all about getting a great cut and cooking technique; we’ll get to that down below as well as the greens and some compound butter. The gratin takes a bit of time to prep, but you can do it a few hours, or even a day or two in advance of dinner and just put it in the oven to warm up and get the top browned and beautiful. The Gratin:
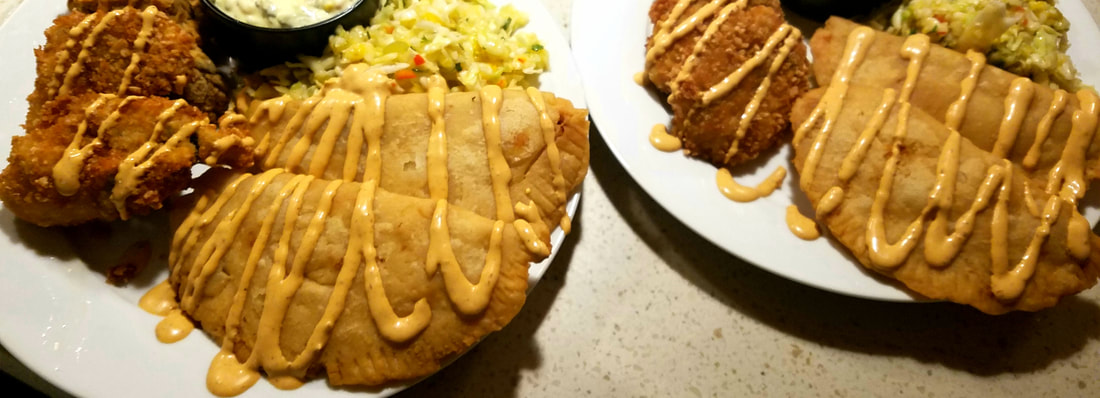
To begin, preheat oven to 350F and then butter the bottom and sides of a 9x9 Pyrex baking dish. In a medium mixing bowl, combine the cream, shallot, garlic and all of the ingredients up to and including the parmesan. Using a mandoline, slice the fennel very thin, about 1/16 of inch. Toss in cream mixture to coat, then remove to a small bowl on the side. Next, slice the potatoes crosswise at about 1/8-inch-thick and immediately place them in the cream mixture. To assemble the gratin, lay the sliced potatoes in one even layer, then a layer of fennel. Crack fresh pepper across the top and then sprinkle about one quarter of the Gruyère. Repeat layering potatoes, fennel, and cheese until you run out. Pour any remaining cream mixture over the layered potatoes. And compress them flat with your hands. Bake until the potatoes have become tender and the surface is lightly golden brown, about 1 hour. A table knife should slip relatively easily through the center when done. Increase temperature to 400F for 15 to 20 minutes until top is deeply brown and the cream mixture is very thick. Let rest for 15 minutes before cutting. Alternatively, you can stop after the gratin is baked through and cool it off for dinner the next day, saving the final step for before dinner time. Now, I will admit that one night, in a time pinch, I microwaved it for 12 minutes on high and then put it in a 400F oven for 20 minutes and it still turned out great. The advantage of using a 9x9 dish! …and now for the rest of the plate. I made this meal with sautéed kale, chard, and spinach for their earthy bitterness. I threw them in a hot non-stick with a splash of oil and minced garlic. Quickly tossed them and added a splash of white wine to steam them. Tossed them around and added a punch of salt. Toss toss toss….and let the pan sit at an angle before plating so the liquid could drain. I chose a large bone-in ribeye, or Côte de Boeuf, for it’s fattiness. (Also called a Cowboy Cut in many US steakhouses). I topped my steaks with a simple herb butter – garlic, shallot, chive, and heavy on parsley for some grassy undertones to bring a tiny bit of levity and accent the vanilla and rhubarb I also caught in there on the nose. In the end, pairing is all about balance. The spice blend is a powerhouse of flavor but brings plenty of finesse – much like the Kathryn Hall Cabernet Sauvignon itself. Get a bag if you haven't already by heading to their website here. Or, use our Porcini Espresso Rub. I have used it on Aged NY as well as Filet and it has not failed to impress testers. For thicker cuts I do add a little more salt and I often season my steaks a day or more in advance. I recommend direct heat for this recipe – the higher the better. I use a carbon steel pan with a few tablespoons of clarified butter, fresh thyme and garlic. Finish in a 250F oven until desired doneness and let rest while you plate up your absolutely stellar dinner. Cheers! Yes, there are fried oysters in this picture as well...get over it , no I'm not doing that recipe on this one too, but I will throw you the chipotle creme recipe with the caveat that is a bit of a cheater. I tested the recipe twice, so the proportions are pretty well on, but I did have a little extra masa last time, but maybe you use more, right? That's what I'm going with anyway.
Makes 12 large empanadas for 4-6 people, or like 36 small ones for a bunch of people if you have that kind of time... Ingredients: 4 C Masa harina 3 C Warm water 2 T Bacon fat 2 T Butter (melted) 3 T Chef's Palette "Special Chili Blend" Filling: 1/2 C Shrimp 1 tsp. Chef's Palette "Seasoned Salt for Fish" 1 C Cooked artichoke hearts 1 1/2 C Jack Cheese or Mexican Blend, shredded 1/3 C Salsa Verde, or Diced Jalapenos, or Ortegas, or just whatever. Have fun. Quick Chipotle Creme: 1 small can Embassa chipotle peppers en mole 1/4 C light oil 1 C Sour Cream 1 lime, juiced 1/2 C Mayonaise Ok. So the sauce is a 'quick and dirty", but you DO NOT need the whole can of chipotles. Puree them them and add the oil to partially emulsify them. In a bowl, whisk the lime, sour cream, and mayo together. Add 2 T of chipotle, whisk, and taste. Adjust accordingly with more chipotle and salt. Put the remaining chipotle in a freezer bag and freeze for later. For the dough: Masa dough is way forgiving and more fun to work with every timer I do this recipe. You just melt the butter and bacon fat, mix everything together thoroughly, and you're good. You can't over mix it, and yes you can sub EVOO, or no fat at all from what I've seen in some recipes; but this is how I do it... sooooo, yeah... Your filling should be cold, so quickly sear your shrimp with the seasoning and chill the ingredients before tossing with your diced artichoke hearts and shredded cheese. You can use peppers, onions, salsa or whatever for flavor, but I have noticed that everyone seems to prefer a simple filling, with plenty of cheese on these ones. (ground beef ones seem to be similarly simple. Just, FYI and all). Large empenadas are about 1/3 C masa. You can flatten with a tortilla press, or a pan, lots of tutorials on this one. Maybe I'll do one later...but not this week that's for sure. They do not hold a lot. Maybe a quarter cup. Do not over fill them; just because. But seriously though, masa is quite forgiving and easy to work with. You do not need to use water or egg to seal the edges. Just press them together. I'll see if I can get some pics at the demo at the Artichoke Festival tomorrow. Fry these puppies off at 375F until crispy and awesome. I always like to mix some pico de gallo with shredded cabbage and maybe some mango for a slaw with these (and yes, I add a shot of tequila to my mango slaw...it's good that way and then I have a reason why the Anejo is on my station). Cheers! DF 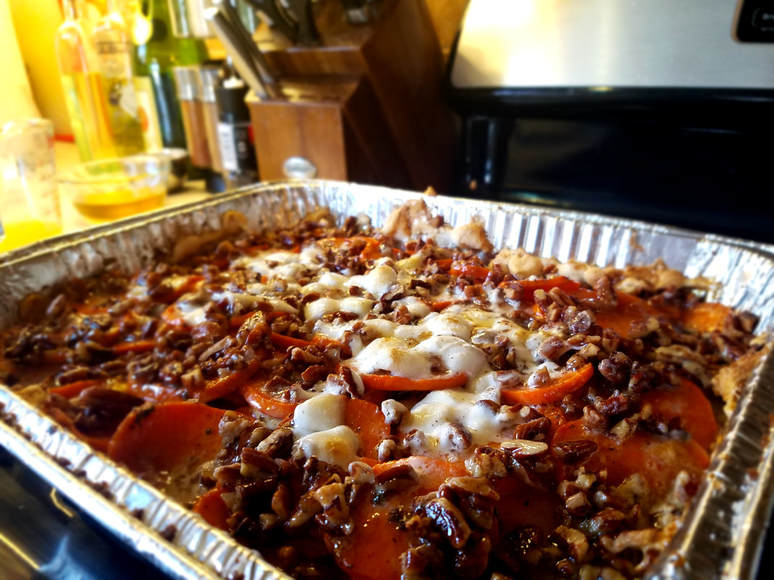 Not pictured: The butternut squash; these are yams. Had to put up some fall-related picture... For this holiday season I have roasted off some butternut squash for a few different events, small and large, and even turned a bunch of it into a delicious vegetarian bisque which I served at the Hahn Wreath-making party. For those who are looking for the recipe it is so simple I don't even think this one requires an official recipe format, but here are some bullet points for ease on the eyes:
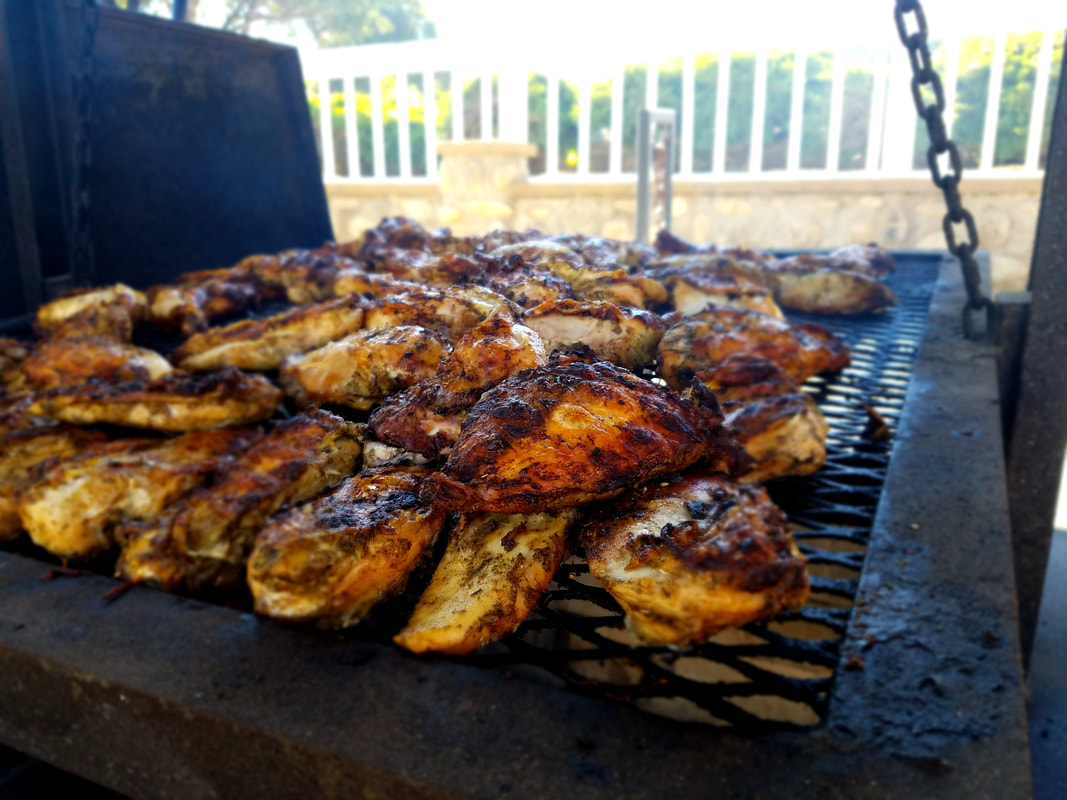
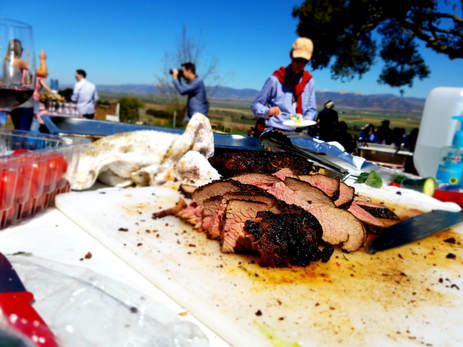 Finally, right?!?! l know I have been inundated with requests for this relatively simple recipe for a few months now at all of the summer BBQ's we did this spring and summer. The delay came in the form of my standard of not publishing untested recipes and as I have never written this one down nor have I done it in a smaller batch (my smallest group this summer was 80 for this one, BTW), so I just needed catch up for a minute to execute a small batch, write it, repeat it and then yes, demo it this last Saturday at the Hahn Harvest Party. So without further digression, here it is! The chicken is brined overnight and then coated in our Poultry not Paltry blend before going over an oak fire until the skin is crunchy and beautiful (see above pic for tummy-rumbling-action!). The sauce is basically a beurre blanc with a few tweaks and additions. The most notable difference is that I often use a more oaky, buttery chard for this recipe as opposed to a crisp, citrus forward pinot gris for a straight beurre blanc. Ingredient: 1 C medium body Chardonnay 1 Tbsp finely minced shallots 1/2 Tbsp "Poultry not Paltry" 2 Sprigs Thyme or 1/8 tsp ground/dried 1 Lemon 1 tsp Chicken flavoured "Better than Bouillon", sodium free 1 tsp Dijon Mustard 1 C Unsalted Butter, 1" cubes, room temp 1/2 C Heavy cream Method: Pour wine into hot saucepan and carefully allow alcohol to burn off. Reduce your heat to medium/medium high. Add Poultry not Paltry seasoning and shallot. (*note: if you prefer to not strain your shallots out at the end - I keep mine - then either use ground thyme or wrap your thyme sprigs in cheese cloth for easy removal later). When the wine is half reduced, zest your lemon directly in then juice your lemon into a small bowl and set aside. Allow the wine to reduce to about 1/4 C then add lemon juice, reduce heat to low. Add lemon juice. and reduce until almost all liquid is gone, or a sec. When I say almost gone, I mean it. You should be 20 seconds from disaster and this may scare you the first few times. Remove from heat and whisk butter in one to two at a time until fully incorporated. Return to very low heat and slowly incorporate cream, followed by the bouillon and Dijon mustard. This type of sauce likes to "break", or separate, if it gets too hot. The extra cream helps stabilize it while also toning down some of the acidity. If it does break you have two options: eat it anyway - it tastes fine! or, you can get super tricky and whisk two egg yolks over a water bath and turn it into a hollandaise. A little complicated, but no joke, I came up that one night. It makes the sauce a little heavier but totally saved all of that yummy butter and wine reduction! Please enjoy, share, and comment! Nice stuff only please, I'm fragile. ;) So, I should say that I am a bit embarrassed that it took me way too long to post this recipe, especially considering that the request came from a great friend that I had promised I would write it after an event and send it to him. Now that it is the frigid season in most of the world (it's like 62F in Monterey and I do indeed think that a few people may be firing off flares to be rescued in hills above Pebble Beach because they are "freezing to death") and I find myself getting ready to execute this recipe myself I remember, oh yeah, "You suck!”
For those that followed the toffee link: fear not and PLEASE do not waste your failed toffee! I will deliver you to caramel bliss with one word; cream. (I do miss Prince, even if just a little). But seriously; if your toffee fails you can easily turn it into caramel and store it for weeks in the fridge. I have never wasted a toffee fail. That being said - here is the toffee caramel recipe that you can use for Bananas Foster, coffee drinks, caramel fondue, or just sprinkle it with salt and eat it. 2 C Butter, salted 2 1/2 C Granulated Sugar 1/4 C Water 1/2 tsp. Vanilla extract 2 C Cream Extra Sea Salt if desired Melt the butter on medium in a large sturdy pan with plenty of extra space, 6 to 8-quart size with high sides if you have one. The last step can be a bit dangerous otherwise. Once the butter is mostly melted swirl it up the sides of the pan. Now, pour the sugar into the middle of the butter, avoiding the sides. Dump the water and vanilla into the middle. Leave the heat on medium and gently stir the mixture - I used a heat resistant silicone spatula. Take your time here and ensure that the sugar fully dissolves, this will take at least 5 minutes. I used a candy thermometer this entire time and once the mixture was fully incorporated I let the heat start to rise to the "Confection Zone" (Highway tooooo theeee Confection Zone!) and set a timer for 5 minutes. I kept it between 240F and 250F the entire time and afterwards increased my heat to just under medium high. You can get the thermometer out of your way if you like at the end of that five-minute period but continue to stir, just to keep the bottom clear. DO NOT stir vigorously, too much air will cool it, and screw it up. In five minutes or so, you will notice that as you stir up the bottom it is starting to darken and you can start to smell the toffee and butterscotch notes. Little wisps of smoke will appear and that signals that should have your heavy cream at the ready and grab your whisk. Let the caramel get dark brown, then add half of the cream. Keeps your hands back for a moment! The steam is intense and will burn you! As soon as the plume dissipates start whisking in the other half still being mindful of not burning yourself if the steam is too much at first. The mixture should come together, but if it doesn’t, don’t worry. Medium high heat and more whisking will smooth out any caramel chunks eventually. If need be, you can add more cream to bring it together (this happened once to me, probably a temperature thing – I am not a confectioner!) So yeah, that’s it. Drizzle it on apple crisp a la mode, mix into spiced apple cider with brandy or apple vodka, or just eat it with a spoon and a sprinkle of crunchy sea salt. Cheers! As promised to a few people, if not a few days later (sorry), here is the recipe for my stuffing/dressing for tomorrow. Cheers!
To begin, open a bottle of delicious SLH or Monterey County Chardonnay, to make sure it’s not corked and just in case your pan gets too hot and you need to deglaze. Or if you get thirsty, whichever comes first. Place cranberries in a bowl and pour 1 cup boiling water over them. Set aside while they rehydrate. Brown sausage in a six quart Dutch oven and break into small pieces. Add mushrooms and sauté until they lose at least half of their water. Add the butter, olive oil, onions, salt, pepper, sage, and celery. Sauté on medium high for two minutes before adding the garlic sauté until fragrant, about 1 minute. Deglaze with chardonnay at any point if needed. Next, add the stock and quinoa and bring to a boil for five minutes. Add the cous cous and parsley and then simmer for 10 more minutes. Remove from heat and add bread crumbs, cranberries, and walnuts. Toss gently and cover for five minutes before fluffing with a fork. Now it’s up to you, bake it in a Pyrex cake pan until the top gets crunchy and awesome, or stuff as much as you can in your bird. This recipe makes a little over a gallon so invite plenty of family and friends. This dressing was developed especially to go with both of Burgundy’s little darlings, so be sure to pick up plenty and enjoy your family the safest way you can; mildly inebriated. Hopefully everyone is ready for thanksgiving and your bird is defrosted (don't be like me, mine is not even purchased! But then, I am hoping to get a fresh one - plus we only have 3 adults this year because well, I said so!). Now, once your bird is defrosted and ready to be seasoned you may have already added some salt. If you are a big fan of Cook's Illustrated , they actually recommend one tsp. per pound at least a day before as opposed to brining, which can leave the skin soggy - and who hell wants soggy turkey skin? Not this guy!
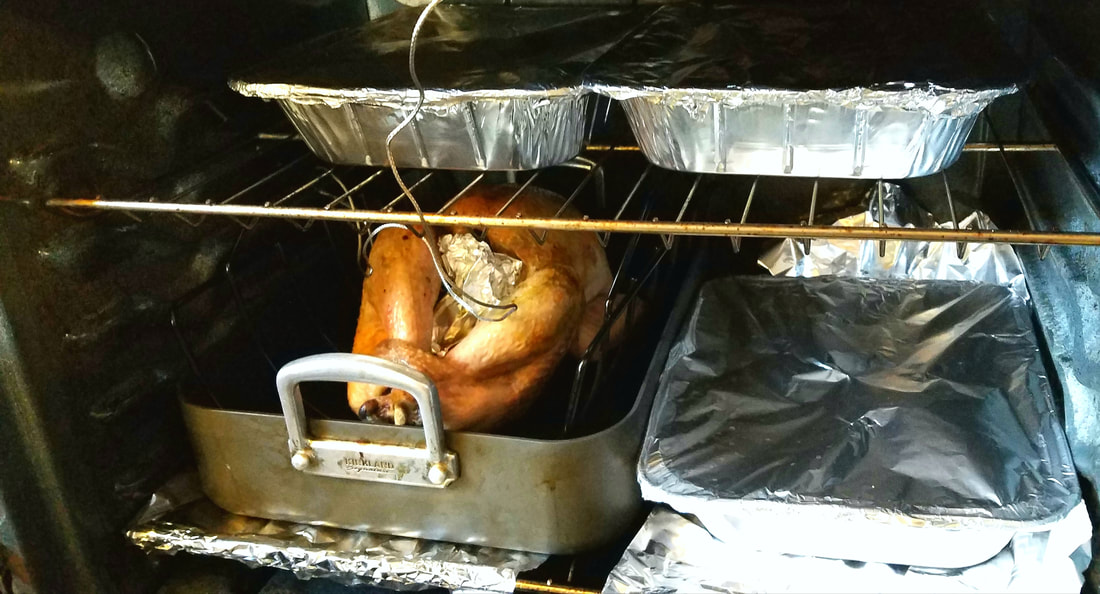
If you are in the know and have picked up you POULTRY not PALTRY rub from either Trio in Carmel or the Hahn Tasting Room in the SLH, then you are going to indeed have the best bird on the block*! The rub does contain some salt, so dial back your salt if you are going to use my rub spice blend. If you have a giant bird then you want to salt it 2 days prior if you can to really let the salt penetrate into the breasts and the thighs. This will help your turkey hold on to its moisture while you're roasting it. For smaller turkeys, chicken, or other dinosaur meat you can add the salt and the seasoning at the same time the day before or even the morning of on the little guys. The salt in the blend is relatively low, but is just right if you were just seasoning chicken breasts, thighs, Cornish hens...etc. So for my tastes I will be adding 1/2 tsp. of salt per pound for my turkey but may do a little less for a 3-4 pound chicken. The other things that I will do for my bird(s) is to loosen the skin from the meat and spread seasoned butter under the skin. Here's how I did it for my roast chicken at La Paulée de Monterey this year at Wrath winery: I melted unsalted Kerrygold butter and stirred in my POULTRY not PALTRY with a little extra salt and then drizzled the melted butter between the meat and the skin, using my hand to squeeze it and move it around through the skin. I used the drippings and melted runoff to baste it while roasting. We started low temp and finished high for browning (when cooking a small chicken, you can break it down and throw it in a screaming hot skillet to really brown the skin - it doesn't suck...) Some sources call for your oven to be between 325F to 350F. I liked our results at 280F, but this will obviously increase the cook time so once again, if you have a giant-ass velociraptor in your oven, you may want to increase your temp a little more, or just plan up to 8 hours roasting time if it is a stuffed 30 pounder. I personally like my dressing with some crunch (and yes, I'll re-post that on here too from last year when I put it up on Hahn's website and served a version of it this last weekend at their Wine Club Party), so I just stuff my bird with veggies and thyme sprigs. A quick example of how I am rolling my little gobbler this year: Turkey weighs 15 pounds. I will mix 2 tbsp salt with 2 tbsp POULTRY not PALTRY, then mix that into 1/2 C melted unsalted butter and rub that all over under the skin. Then I'll shove some parsley stems, carrots, fennel, thyme, celery, and onions into a very uncomfortable place; like the back of a Volkswagen ;) I'll slowly roast at 180F and plan about four hours. I'll actually warm my potatoes, green bean casserole, and dressing in there during the last 60 to 90 minutes. I'll pull the turkey and turn the heat up to 400F for 10-15 minutes - 5 of which will be preheating anyway - to let the dressing, green beans and potatoes get a good crunch going. Once I pull them, I'll increase my heat to 450F and then put my turkey back in fr 5-10, until it gets crispy on the outside, but has already started to rest and will not increase it's temperature dramatically at all. This will give it about 25 to 30 minutes of resting, while still serving it with good, hot skin. Now, off I go to the store! Cheers! Chef Dyon *Unless your neighbors are awesome and are also reading this; then you have to settle for a tie. Sorry. I keep saying I need to get some new content up and then one day I fall into the trap that my laptop has set for me and here I am, two hours later! We had a very busy June and July and somehow completely blacked out for most of August it seems. For anyone reading this: I mean it when I say send me your questions. I actually make it a priority to answer those quickly! It gets me on our site and reminds me to fix stuff. So I guess what I'm really saying is that it's all YOUR fault I haven't posted in 3 months! I will get on here soon and really get some fun stuff going. Cheers! -DF
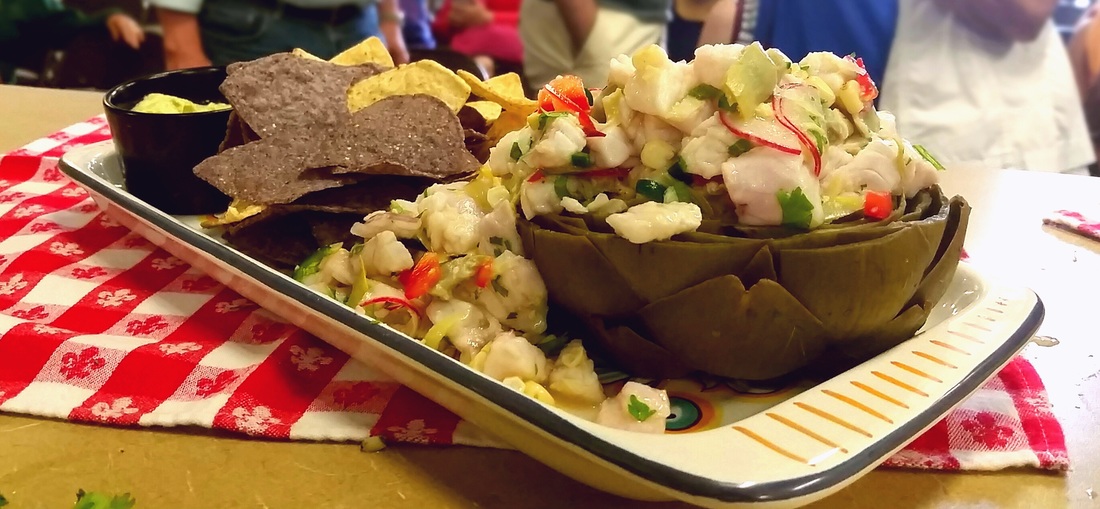
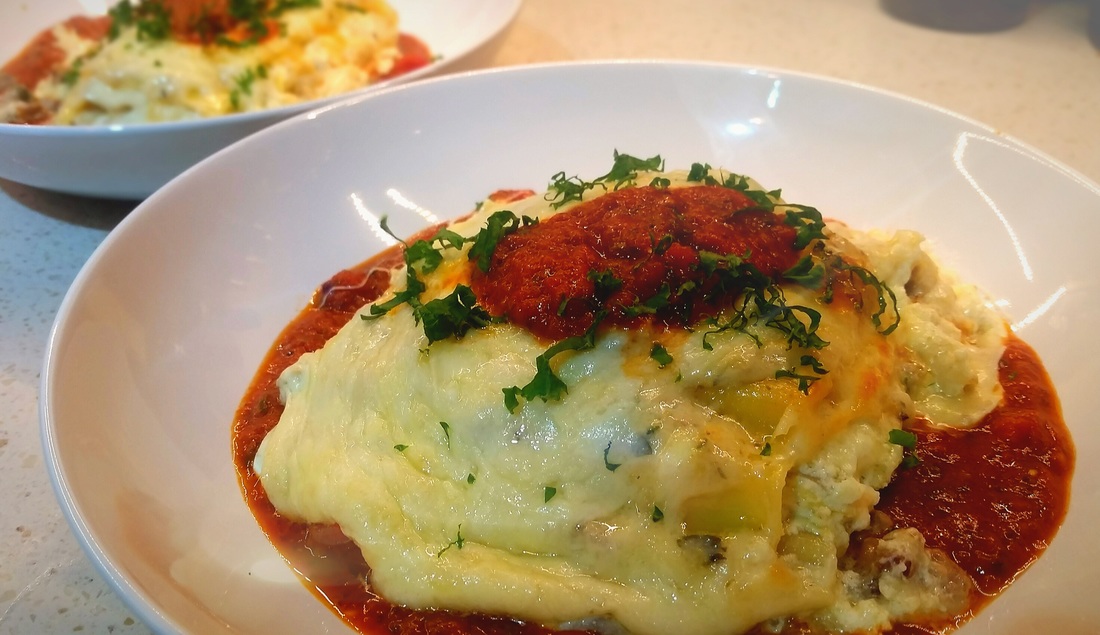
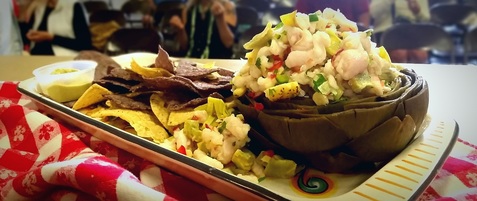 Artichoke Ceviche Makes 8 servings. 1 Jumbo Artichoke, trimmed, boiled, choke removed 4 “Baby” artichokes, cleaned, boiled in lemon water, chopped 1 Lb. local, fresh-caught fish, (such as rockfish, sole, or snapper in our area) 2/3 C fresh lime juice 1/2 grapefruit 1/2 orange or tangelo 2 Tbsp finely shaved shallot 1/4 C poblano or jalapeno pepper, de-seeded and finely sliced 1/4 C red bell pepper, finely diced 1 medium ear corn, fire-roasted 1/4 C loose fresh cilantro leaves 1/4 tsp. Seafood Salt for the ceviche 1/4 tsp. Chili Blend to dust the chips 3 radishes, thinly julienned Tortilla Chips for service Optional Avocado Artichoke Cream: ½ C Canned or jarred artichoke hearts 1/2 small avocado ¼ C sour cream, full fat (optional) Dash of Valentina or Tapatio hot sauce This recipe is obviously more about the artichokes than the spice rubs. We had a great time at the 57th Annual Castroville Artichoke Festival and even made artichoke lasagna for dinner on Sunday night - I'll get more into that in a minute. Now it's time to do as promised and post the recipe for the summertime deliciousness you see above. After all, it is a bit late but the family is fed and the kids are in bed! Great Success! Ceviche is really quite easy: pick your ingredients, chop them all up the same size, "cook" the fish in lime juice, serve. Now the details. Use only the freshest fish, as in still floppin' around boat if you can get it! I used rock cod the first day and petrale sole this afternoon. I preferred the rockfish which was thicker cut and more firm. Te trade off, however, was that after 30 minutes it was cooked to a little past medium rare which may worry a few of you guests, but is actually perfect! The sole on the other hand was more like medium well after 20 minutes in the juice. I noticed 1/3C juice per half pound of fish worked well and cooked at a good speed. I set the fish to marinade and then prepped my other ingredients (be sure to shock your artichokes in ice water to cool them off so they do not heat up your ceviche, gross). I keep the shallots separate and when my fish is almost ready I mix them in to let their flavor mild a little with the acid and after 3 minutes I drain off the excess lime juice. Then I squeeze in a half of an orange and half of a grapefruit, toss in the Seafood Salt and all of the other ceviche ingredients a gently mix it. At this point, if you want to put it in the fridge or on ice for 15 minutes that would be ideal - enough acid has been removed that it shouldn't over-cook. If you used sole, and it's already cooked then maybe just serve it - you don't want it to get chalky. To offset the acidity of the dish a little I like a fatty, sour cream based sauce. Put the ingredients into a jar and use an immersion blender to make a smooth sauce and it's done super quick! I served mine with tortilla chips that I dusted in our Special Chili Blend; it was perfect on the warm day that we all enjoyed at the Monterey County Fairgrounds. Maybe next year I'll share my Lasagna Bianca that I made up tonight: Italian sausage and ground veal cooked in a garlic cream sauce layered between pasta sheets and ricotta, provolone, mozzarella and of course lots of artichoke hearts! To finish it off and add a splash of color I served it with an artichoke and kalamata puttanesca sauce.Now with my belly full and this blog post done the Sand Man is coming! Cheers and sweet dreams! |
Dyon J. Foster, Chef/OwnerTips, tricks, tutorials, videos and odd ramblings that will probably mention food and drink! Archives
December 2020
Categories
All
|
Chef’s Palette Spice Rubs
The Chef's Blog
Proudly powered by Weebly
 RSS Feed